
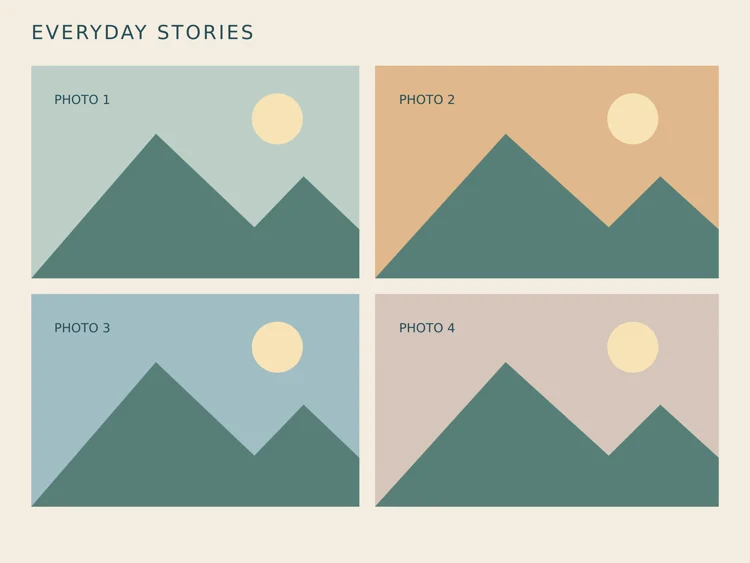
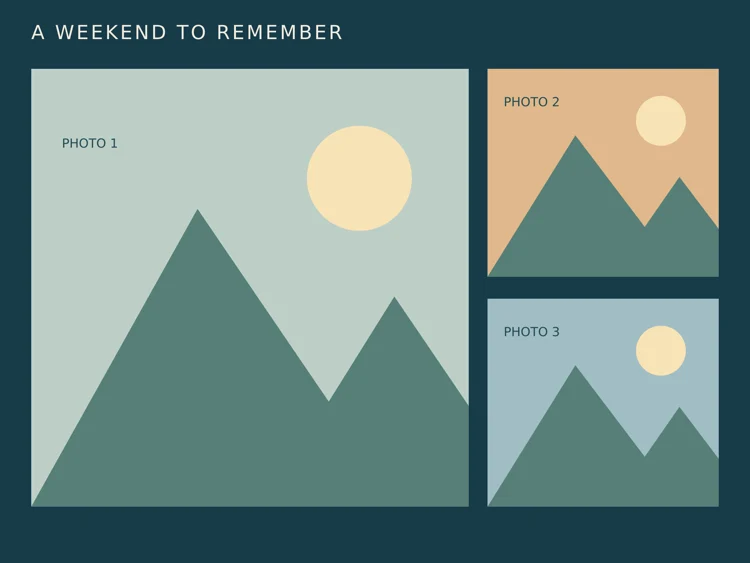
Collage PSD templates help you arrange several photographs within a consistent page design. These two downloads provide a four-photo editorial grid and a three-photo storyboard with one dominant image. Each pack contains a genuine layered Photoshop PSD at 2400 by 1800 pixels and a flattened PNG preview. The background, photo bases, demonstration art and caption are named pixel layers. They are not smart-object templates, and the caption is not a live text layer.
Compare the two downloads with your actual project in mind. The previews show the supplied layout or artwork, including the prompts and demonstration elements that explain how it is organized. Choose the option that best fits a photo collage with a clear image hierarchy, then edit a separate copy. The file descriptions below identify what is editable and what needs to be replaced before the result is ready to use.
Compare the two downloads
| Template | Download format |
|---|---|
| Four Photo Editorial Collage | Layered PSD and PNG preview in ZIP |
| Three Photo Storyboard Collage | Layered PSD and PNG preview in ZIP |
Choose a layout around the photographs
The four-photo grid gives each image a similar amount of space, making it useful when all four photographs deserve comparable attention. The storyboard places one large image beside two smaller supporting images. Choose the structure after reviewing your photographs rather than forcing an important portrait into an unsuitable crop. A main image can establish the setting, while the smaller pictures show details. Keep the sequence meaningful so the collage communicates a memory, an event or a small visual story instead of becoming a collection of unrelated rectangles.
Understand the layers in the PSD
Each photo position has a named base layer defining its rectangle and a separate demonstration-art layer that can be hidden. The background and caption have their own layers. The supplied scenic shapes are placeholders, not photographs included for publication. The PSD layers can be moved or hidden, but pixel content does not behave like an editable vector shape or live text. Keep the original file and work on a copy. If you want a different caption, hide the caption layer and add a new text layer in your editor.
Place photographs using the base rectangles
Hide the demonstration artwork for the position you want to replace. Put your photograph immediately above the corresponding Photo base layer, then use the editor’s clipping-mask workflow so that the base rectangle defines the visible area. Reposition the photograph inside that area and check the crop around faces or other important details. Repeat for the remaining positions. The named bases make the structure easier to follow, but the files do not include an automatic smart-object replacement system or an action that inserts photographs for you.
Keep the editable collage and the final export
Save a PSD copy while you are still arranging pictures. Export a separate flattened image when the collage is ready to share. The supplied canvas dimensions describe the pixel size, not a promise that every print size will be equally sharp. Check the intended physical dimensions and the quality of your photographs before printing. For a digital post, inspect the image at the actual display size. Small captions and detailed faces can become difficult to see when a full collage is reduced to a thumbnail.
Download the templates and view the previews
Four Photo Editorial Collage
The preview is a flattened view of the sample arrangement. The ZIP includes the layered PSD and a PNG preview. Hide the demonstration artwork before inserting your photographs. Keep an original copy of the download and save your project under a separate descriptive name.
Three Photo Storyboard Collage
The preview is a flattened view of the sample arrangement. The ZIP includes the layered PSD and a PNG preview. Hide the demonstration artwork before inserting your photographs. Keep an original copy of the download and save your project under a separate descriptive name.
Details to check before using the template
- Image selection
-
Choose photographs with a shared purpose and enough quality for the space they will occupy. A large storyboard frame needs a source image that can withstand the intended crop. Remove nearly identical images when they add little to the story, and consider how the set works as a whole before adjusting individual colors or borders.
- Photo positions
-
Use the named base layers to identify the intended frame dimensions. Keep the base rectangles consistent unless you deliberately redesign the composition. When moving a position, check its relationship to nearby frames and the outer margin so the arrangement does not gradually lose its alignment.
- Demonstration artwork
-
Hide the placeholder-art layer for each photograph you replace. Leaving it visible above your inserted image can make the new photograph appear covered or incorrectly clipped. Keep the layer available in your working copy if it helps you understand the original structure, but exclude it from the finished collage.
- Crop and subject placement
-
Check the crop inside each frame after resizing or moving a photograph. A centered crop is not always the best choice. Keep faces and important objects clear of edges, and consider the direction a person is looking so the image supports the surrounding composition rather than appearing accidentally cut off.
- Caption and background
-
The supplied caption is rasterized on its own pixel layer. Hide it and add your own text when changing the wording. Review the background color with your photographs, because a color that suits the placeholder art may compete with the real images. Keep the caption short enough to remain useful at the final size.
- Export and file organization
-
Retain the layered PSD separately from the sharing image. Use filenames that identify the project and revision, and open the exported image outside the editor before sending it. Keep your original photographs available so a later crop or size change can start from the source rather than a previously reduced export.
A practical example
For a family weekend, the storyboard can use a wide setting image as the dominant frame and two detail photographs beside it. For four equally important portraits, the grid provides a more balanced starting point. Replace each scenic placeholder, add a short caption on a new text layer and compare the whole collage at the size it will be viewed.
How to prepare the finished version
- Extract and inspect the files. Extract the ZIP and keep the PSD, preview and instructions in one folder. Open an editable copy of the PSD in a compatible application and inspect the named layers. The flattened PNG helps you understand the starting appearance, but it does not contain separately editable layers. Keep the original photographs outside the template folder until you are ready to insert them.
- Replace one position at a time. Start with the image that will receive the most space. Hide its demonstration-art layer and place the photograph above the matching base layer. Follow the clipping-mask process for your editor, then move and scale the photograph within the visible rectangle. Review that position before continuing so a layer-order mistake does not get repeated across the whole collage.
- Review the visual sequence. After inserting all photographs, look at the complete arrangement rather than only the individual crops. Compare the brightness, dominant colors and direction of the subjects. Move a photograph to a different position if that creates a more coherent sequence. Keep important details away from the outer edge and preserve the intended gaps between frames unless you are deliberately redesigning them.
- Replace the caption deliberately. Hide the supplied caption pixel layer and add your own text layer if you want new wording. Keep the caption short and check its contrast against the background. Save the layered working file before exporting. Inspect the flattened export at normal size and confirm that all demonstration labels and unused sample artwork have been removed.
A final project review
A final collage review should include both the full composition and the smallest intended display. Check whether the dominant image still leads the story and whether supporting photographs remain recognizable. Inspect the edges of each clipping area for an unintended strip of placeholder color or a cropped face. If you change the background, compare the caption contrast again. Keep the editable layers until the person using the collage has approved the arrangement, because a flattened export makes later adjustments much less flexible. For a print order, inspect a proof at the actual physical size before choosing a large quantity.
Why use a layered collage PSD
A photo collage tells a story that a single image cannot: the before and after of a renovation, highlights from an event, a product from several angles, or a sequence of moments from a trip. Building a collage from scratch in Photoshop means drawing frames, aligning gutters, masking each photo and setting up text, which takes time and is easy to get slightly wrong. Layered collage PSD templates do that groundwork for you, so you can focus on choosing and arranging the images.
These two collage PSD templates come with PNG previews so you can see the layouts before opening Photoshop. One is a four-photo grid, a balanced layout that suits product sets, portfolio highlights and social posts. The other is a three-photo storyboard, which arranges images in a sequence that reads like a short story, ideal for step-by-step processes or before-and-after comparisons. Both use named, editable pixel layers so you always know which layer to change.
What “layered” and “named layers” mean in practice
In a layered PSD, every element sits on its own layer: background, photo placeholders, frames or borders, text and decorative shapes. Named layers such as “Photo 1”, “Photo 2”, “Caption” and “Background” make the file easy to navigate, especially when you return to it weeks later or hand it to a colleague. Photo placeholders are typically set up so your image can be clipped into the frame shape, meaning the photo only shows inside the frame and can be moved or scaled without changing the layout.
The two layouts compared
Four-photo grid
Four equal or near-equal frames separated by consistent gutters. It is visually stable and works well when photos have similar importance, such as four products in a range, four team members, or four views of a property. Grids are also easy to crop into square or portrait social media formats.
Three-photo storyboard
Three frames arranged to guide the eye from left to right or top to bottom, sometimes with one larger hero image. It works for sequences: preparation, process and result; before, during and after; or arrival, event and departure. Captions under each frame help explain the story.
How to use the collage PSD templates step by step
- Preview the PNGs. Decide which layout suits your photos before opening Photoshop.
- Open the PSD. Check the canvas size and resolution in Image Size; adjust if you need a different output size.
- Open the Layers panel. Find the named photo placeholder layers.
- Place your photo. Select the placeholder, then use File, Place Embedded to add your image above it.
- Clip the image. Right-click the photo layer and choose Create Clipping Mask so it fits inside the frame.
- Position and scale. Use Free Transform with Shift held to keep proportions; center the main subject.
- Edit text. Double-click the text layers to change captions, titles or dates.
- Adjust colors. Change the background or frame color layers to match your brand or theme.
- Export. Use Export As to save JPG or PNG files sized for print, web or social media.
- Save the layered version. Keep a PSD copy so you can update the collage later.
When to use each collage
- Social media posts showing product ranges, event highlights or tutorials.
- Portfolio pages for photographers, designers and makers.
- Real estate and interior design before-and-after presentations.
- School and community newsletters summarizing events.
- Recipe and craft blogs showing steps in sequence.
- Personal keepsakes such as birthdays, trips and family milestones.
Tips for better collages
- Choose photos with consistent lighting and color, or apply the same adjustment layer to all of them.
- Vary close-ups and wide shots to create rhythm.
- Keep gutters consistent; avoid nudging frames by eye.
- Use high-resolution images for print, ideally at the final size or larger.
- Limit text to short captions so the photos stay the focus.
- Check your collage at the size it will be viewed, such as on a phone screen.
- Use smart objects if you plan to resize images repeatedly without losing quality.
Common mistakes to avoid
- Low-resolution images. Small photos become blurry when scaled into larger frames.
- Forgetting clipping masks. Images then cover the frame borders and gutters.
- Cutting off important details. Faces and products should not sit on frame edges.
- Mismatched colors. One very warm photo next to cool ones can look jarring.
- Flattening too early. Always keep a layered master file.
Worked example: a photographer’s session highlights
A family photographer wants to share highlights from a weekend autumn session. She uses the three-photo storyboard: a wide shot of the family walking through a park, a mid-shot of the children playing in leaves, and a close-up of the parents laughing. She places each image into the named placeholders, clips them, and applies a single warm color adjustment to the whole group so tones match. A short caption under each frame reads “Arrive”, “Play” and “Remember”.
She exports a square version for social media and a larger JPG for her website. For her mini-session promotion next month, she reuses the same images in a photography flyer, creates a matching channel header using a YouTube banner template, and builds a client gift using one of the photo album templates.
Preparing collages for print
If you plan to print a collage, set the document to the final print size at 300 pixels per inch, add bleed if your printer requires it, and keep important content away from the edges. Export as a high-quality JPG or PDF according to the printer’s instructions. Before printing a batch, place the collage into an A4 mockup or print a single proof to check colors and sharpness. Screens are brighter than paper, so slightly lifting shadows can help.
Working without Photoshop
PSD files can also be opened in several other editors, although support for layer styles, smart objects and clipping masks varies. If you do not have Photoshop, test the file in your editor before committing to it, and check whether named layers and masks remain intact. For simple jobs, you can export the PNG preview as a guide and recreate the frames in your preferred tool, or combine your photos with a neutral background from a PNG backgrounds set.
Using images you have the right to use
Collages often combine photos from several sources. Use images you took yourself, those provided by clients with permission, or stock images licensed for your intended use. When featuring people, especially children, make sure you have consent to publish their photos. Credit photographers where appropriate, and keep a note of image sources in a hidden text layer or separate file so you can answer questions later.
Building a consistent collage style
If you publish collages regularly, consistency helps your work become recognizable. Keep the same gutter width, frame color and caption font across posts, and save your customized version of the template as a new master file. Some creators keep a small set of color presets as adjustment layers so every collage shares the same tone. Over time, this gives a social feed or portfolio page a coherent look without extra effort on each new design.
Organizing files for faster editing
Before you start, gather your chosen photos in one folder and name them in the order you want them to appear, such as 01-wide, 02-detail and 03-closeup. Inside the PSD, keep each placed photo directly above its placeholder and rename it to match, so the Layers panel stays readable. Group related layers, such as all captions, into folders. When you finish, save the PSD with a descriptive name and date, and export final images into a separate folder. This simple routine makes it much easier to update a collage later or reuse the layout for a new project.
Collage PSD template FAQs
Do I need Photoshop to use these templates?
The templates are made for Photoshop. Other editors may open PSD files with varying support for layers and masks.
How do I replace a photo in the collage?
Place your image above the named placeholder layer, create a clipping mask, then move and scale it.
Can I change the collage size?
Yes. Adjust canvas size or image size, then check frames and gutters remain balanced.
What resolution should I use?
Use 300 PPI at the final size for print and the platform’s recommended dimensions for screens.
Can I add more frames?
Yes. Duplicate an existing frame and placeholder layer, then rearrange the layout.
What are the PNG previews for?
They show the layout at a glance so you can choose a template before opening the PSD.
Conclusion
Layered collage PSD templates save hours of setup and help you create balanced, professional photo layouts. Choose the four-photo grid for sets of equal importance and the three-photo storyboard for sequences and stories, place your images into the named layers, and export for print or social media. Download both PSD files with PNG previews above, and browse more design resources in the category archive. With a good layout in place, every new set of photos takes only minutes to turn into a polished collage ready to share.
Related resources
For related planning and supporting information, explore Free Company Profile Templates and PDF Examples, Pull Tab Flyer Templates and Printing Guide, Free Contact List Templates and Organization Guide. Choose the resource that matches the next step and keep the information consistent with your current project.
Official format guidance
Adobe clipping-mask guide provides additional application guidance for the file workflow described above.
Frequently asked questions
Are these real PSD files?
Yes. The packs contain layered PSD documents with named pixel layers, plus flattened PNG previews. The files were reopened and their layer structure checked.
Do the templates have smart objects or live text?
No. Photo bases, demonstration art and captions are pixel layers. Hide the caption and create your own text layer when you want different wording.
Why is my photograph hidden?
Check the layer order and hide the matching demonstration-art layer. Place the photograph directly above the appropriate base layer before applying the clipping mask.